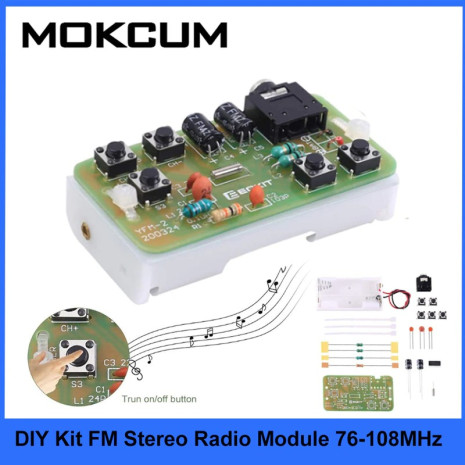
• Diy Kit Fm Stereo Radio Receiver Module Adjustable 76-108Mhz Wireless Receiver Diy Electronic Production Training Welding Skills


    USD $3.60VAT Included50% OFFFree Shipping
    Just for Dropshipping and Wholesale


    How to pay?
    • Ships in 24 hours via Fast Shipping.
    • Estimated Delivery 5 to 9 Business Days.
    Customer Reviews
    *Note: Some reviews have been processed by Google Translate!
    J***b Verified Buyer

    I went all very quickly about 14 days to Rostov-on-Don. The Assembly took a relatively little time, but for the beginner, it will be very interesting and funny. I saved the batteries and everything started at once, but it seems to me a weak signal, few radio stations caught at me (3 PCs total), it would be great to increase the signal. For a very long time I could not understand from 2 parts where the resistor and where the coil (throttle), I had to look for a circuit to recognize the power and determine what it the color Everything turned out, I liked it very much. Thank you seller.

    4
    P***x Verified Buyer

    A quality board, very strong))) conclusions of radio elements made of elastic metal are not made of copper (it is desirable to leave the minimum necessary length when mounting) but despite this soldered receiver decently catches the stations and reproduces active computer speakers, several of the accepted stations like even in stereo mode, connected to the sample. And so kind of a circuit that the stations are accepted even with a chip not soldered to the signal input by the capacitor, I.E. Without connected in regular antenna mode.

    4
    Z***k Verified Buyer

    I recommend this product, I was surprised by the good sensitivity of the stereo radio and pleasant sound. Installation is simple, even the average amateur radio can handle it. I am surprised that this module in SMD design is not used by the manufacturers of Bluetooth devices, who install only MONO radios in their products and the year 2022 is written.

    4
    G***g Verified Buyer

    Everything came quickly, thanks to the seller. But there is one point. Since the radio assembly kit is designed for beginners of radio lovers, it would be necessary to put another scheme on the device in the kit, but this applies to the manufacturer, and not to the seller Seller recommend

    5
    J***m Verified Buyer

    Nice, good quality, sensitivity and the quality of signal on top, disappointed that the switch button is not working receiver is always on. Though… It is possible that my school in soldering) generally recommend. Would some sort of case-would do fine

    5
    L***n Verified Buyer

    In appearance, all the details are whole. The only case for the batteries is slightly bent, there is no rigidity. It's been a long time. I haven't collected yet.

    5
    C***q Verified Buyer

    It came to the Moscow region in 4 weeks. By completeness, everything is OK. As we collect, I will complement the review.

    5
    Z***o Verified Buyer

    Cool goods, came quickly. It is collected easily and catches all waves. There was no need to communicate with the seller

    5
    N***s Verified Buyer

    Great little kit. Radio works well. For the chip soldering is flux and precise soldering iron needed.

    5
    Y***i Verified Buyer

    Item arrived on time and all components are present. Not assembled and tested yet. Hope it works OK.

    5
    C***v Verified Buyer

    Assembled, inserted batteries, works fine. In the description of the goods there is a scheme.

    5
    P***y Verified Buyer

    I didn’t got any instruction or manual. How I can accumulate or collect all details?

    5
    D***j Verified Buyer

    Great stuff. Very fast delivery to Moscow. Thank you.

    5
    K***c Verified Buyer

    Great radio. Revived the old player. Recommend.

    5
    C***m Verified Buyer

    Corresponds to the description. Seller good

    4
    G***i Verified Buyer

    Good set. Especially the price.

    5
    Y***w Verified Buyer

    Came quickly, will collect.

    5
    I***j Verified Buyer

    Fast shipping 10 star

    5
    R***d Verified Buyer

    Thank you. very good

    5
    A***q Verified Buyer

    Good office

    5
    B***l Verified Buyer

    Thank you!

    4
    G***q Verified Buyer

    Is working

    4
    Y***y Verified Buyer

    Merci

    4
    Q***j Verified Buyer

    Norms

    5
    K***d Verified Buyer

    good

    5
    Y***v Verified Buyer

    good

    5
    X***m Verified Buyer

    Ok

    4

    Certification: NONE
    DIY Supplies: ELECTRICAL
    Measuring Range: 76-108Mhz
    Dimensions: 57*32*20mm
    Operating Temperature: -40℃~85℃
    Model Number: FM Radio Receiver DIY Kit
    Item: FM Radio Receiver DIY Kit
    Working Voltage: DC 3V
    Work Current: 19mA
    Work Frequency: 76-108Mhz
    Output impedance: 32ohm
    Usage: Welding Practice/ DIY Electronics
    Feature 1: DIY Radio Kit
    Feature 2: FM Radio Receiver
    Feature 3: FM Receiver Module


    Note

    1. It is a radio. If the radio is not received, there will be white noise. You need to adjust the receiving radio by pressing the button.
    2. Don't use it in an environment with interference, otherwise there will be a lot of white noise.
    3. The frequency can be adjusted. The signal of each frequency is strong or weak. If it is a relatively weak signal, this frequency cannot be played clearly.
    4. Is there any noise in the headset? If there is noise, the radio station may not be searched.
    5.It is recommended not to use it in an environment with interference. You can try it outdoors. The indoor reception signal is easily interfered.


    DIY Kit FM Stereo Radio Module Adjustable 76-108MHz Wireless Receiver DC 3V

    1.Introduction:
    The YFM-2 type radio circuit is very simple. The total number of components does not exceed 19. Although the number of components is not large, it includes two types of components: SMD and DIP which are suitable for novices and friends who want to practice soldering of SMD components.

    2.Feature:
    1>.Built-in digital automatic gain control (AGC) circuit
    2>.Support the global frequency band 76-108Mhz
    3>.DIY manual welding
    4>.Simple and easy to operate
    5>.Support radio memory function

    3.Parameter:
    1>.Item name: FM Stereo Radio Module DIY Kit
    2>.Item Mode:YFM-2
    3>.Work Voltage:DC 3V
    4>.Work Current:19mA
    5>.Work Frequency:76-108Mhz
    6>.Output impedance:32ohm
    7>.Work Temperature:-40℃~85℃
    8>.Work Humidity:0%~95%RH
    9>.Size(Installed):57*32*20mm

    4.Application:
    1>.Training welding skills
    2>.Student school
    3>.DIY production
    4>.Project Design
    5>.Electronic competition
    6>.Graduation design
    7>.Crafts collection
    8>.Home decoration
    9>.Souvenir collection

    5.Installation Tips:
    1>.User needs to prepare the welding tool at first.
    2>.Please be patient until the installation is complete.
    3>.The package is DIY kit.It need finish install by user.
    4>.The soldering iron can't touch the components for a long time(1.0 second), otherwise it will damage the components.
    5>.Pay attention to the positive and negative of the components.
    6>.Strictly prohibit short circuit.
    7>.Install complex components preferentially.
    8>.Make sure all components are in right direction and right place.
    9>.It is strongly recommended to read the installation manual before starting installation!!!

    6.Installation Steps(Please be patient install!!!):
    1>.Step 1: Install 1pcs SOP-16 RDA5807PF at U1.There is a dot on one corner of the IC and there is a rectangle pad on PCB where the Pin1 of IC can place on.These two marks are corresponding to each other and are used to specify the installation direction of the IC.
    2>.Step 2: Install 1pcs 30K ohm Resistor at R1.
    3>.Step 3: Install 1pcs 0.1uH Inductor at L1.
    4>.Step 4: Install 2pcs 1uH Inductor at L2,L3.
    5>.Step 5: Install 1pcs 32.768KHz Crystal Oscillator at Y1.
    6>.Step 6: Install 1pcs 24pF Ceramic Capacitor at C1.
    7>.Step 7: Install 1pcs 0.01pF(103) Ceramic Capacitor at C2.
    8>.Step 8: Install 1pcs 0.022pF(223) Ceramic Capacitor at C3.
    9>.Step 9: Install 5pcs 6*6*5mm Switch at S1-S5.
    10>.Step 10: Install 1pcs 100uF 16V Electrolytic Capacitor at C4,C5. Please pay attention to the positive and negative poles. The shorter pin is the negative pole.
    11>.Step 11: Install 1pcs 3.5mm Audio Jack at J1.
    12>.Step 12: Connect battery box.Pay attention to positive and negative.
    13>.Step 13: Use a cable tie to fasten the battery box.
    14>.Step 14: Connect to power supply and enjoy the effect.